Showing posts with label Home Decor. Show all posts

Saturday, September 10, 2011

School Stuff

My house doesn't have a lot of wall space or closets for hanging backpacks. So I did this.  Ethan is now in Kindergarten and Dane is in Preschool, and they both almost always bring home a work of art from church every week. So with all these things coming home i needed a place to display all their stuff.  so here is the "look at what I made!" spot.  It is just the side of my cupboards, and they each have a spot for their backpack and two clipboards for any works of art they bring home!  It's working great!  A little vinyl to make it cute, a few knobs for hooks and four mod podged clipboards.


Monday, April 25, 2011

So Long Easter Decorations...

The maine reason for posting this is so I can remember how I decorated for next year... I have to say my spring decor was rather boring before this year, with all my new crafts I like it much better. It's sad to think that I made over half of this stuff this year... My decor before must have been really sad...
 

Friday, April 22, 2011

Living Room Change #3

So this was before...
I didn't do a whole lot this year. I basically painted the green stripe dark red...
 Found this material at Joann's and made some pillow covers...
 Re-painted my canvas.
 And made some removable covers for these lamps. I'll post a tutorial for the lamps soon.  The original lampshades are so cute... so I didn't want to ruin them... so these fabric covers are just double stick taped on! I'm sure next year I'll be redecorating anyway, so i gotta make everything easy to re-do...

Sunday, April 17, 2011

Spring Cleaning

Apparently my definition of spring cleaning is redecorating...   i've lived in my house for two years and every spring i've redecorated... 
this is when we first moved in...
 1st spring I changed to this...
 2nd spring I changed to this...
3rd spring or this year???...  Yes. that is what i'm working on this week!!!  stay tuned for all my finished projects...   I'll just say the green is gone...
update:  my bedroom... branch is done... still looking for the perfect bedding though...

Tuesday, April 12, 2011

In the middle of a mess...

So when I saw this vinyl branch I knew I wanted to do that in my master bedroom...  I thought oh, I have a vinyl machine, what an easy decoration... but for some reason my husband has put a limit on vinyl... he said we have too much... so this is crazy but I decided I would paint...
1. So I first painted the top half of the room a steel gray/blue color... it's called greyhound from walmart, and i love it!!!
 2. Using a pencil I sketched out the branch.

3. Using a 1inch brush I lightly painted over the pencil...  To make the edges crisp I used a 1inch foam brush and went over all the edges...
Over the past week I've added leaves.... yes it's taken a week... Each day I've added a few more...
 STAY TUNED for the big reveal... Hopefully it will include a new bed spread... thank you Tax return!

Friday, February 25, 2011

This saves my life!

So having kids is ALWAYS messy.  Well, the constant cleaning of my wood table was wearing on the finish. So thanks to my sister-in-law, she gave me this brilliant idea.  I'm sure people all over do this, I just have a few tips to make it look good.  Just go to walmart, in the craft/fabric section and buy the clear plastic, it's meant for picnic tables and stuff, it's on the big rolls... anyway its so cheap, you can get different weights too. I get the medium which is like 2.00 a yard...  so at 6.00 dollars I don't mind getting a new one every 6months to year, depending on how messy it gets... anyway my tips:
Tip #1: on the edges, fold them into the inside and use double stick mounting tape, I used 3M clear tape, anyways use the tape to keep the edges together... You don't see it and it holds really well. And it gives it a finished look and it keeps the table cloth from MOVING, that is key, it makes wiping/cleaning so much easier when your not trying to keep the cover in place!!!!
Tip #2. Not only does this protect your wood tables, it protects your table cloths!
Tip #3:  Use window clings for EASY decorating!

Thursday, February 24, 2011

Easy Decorating

Easiest holiday decor ever. I just add window clings to my white plates. Easy to do, easy to store, easy to change. I do something else with window clings that I'll share tomorrow!

Monday, February 21, 2011

Where's Me Pot O' Gold?

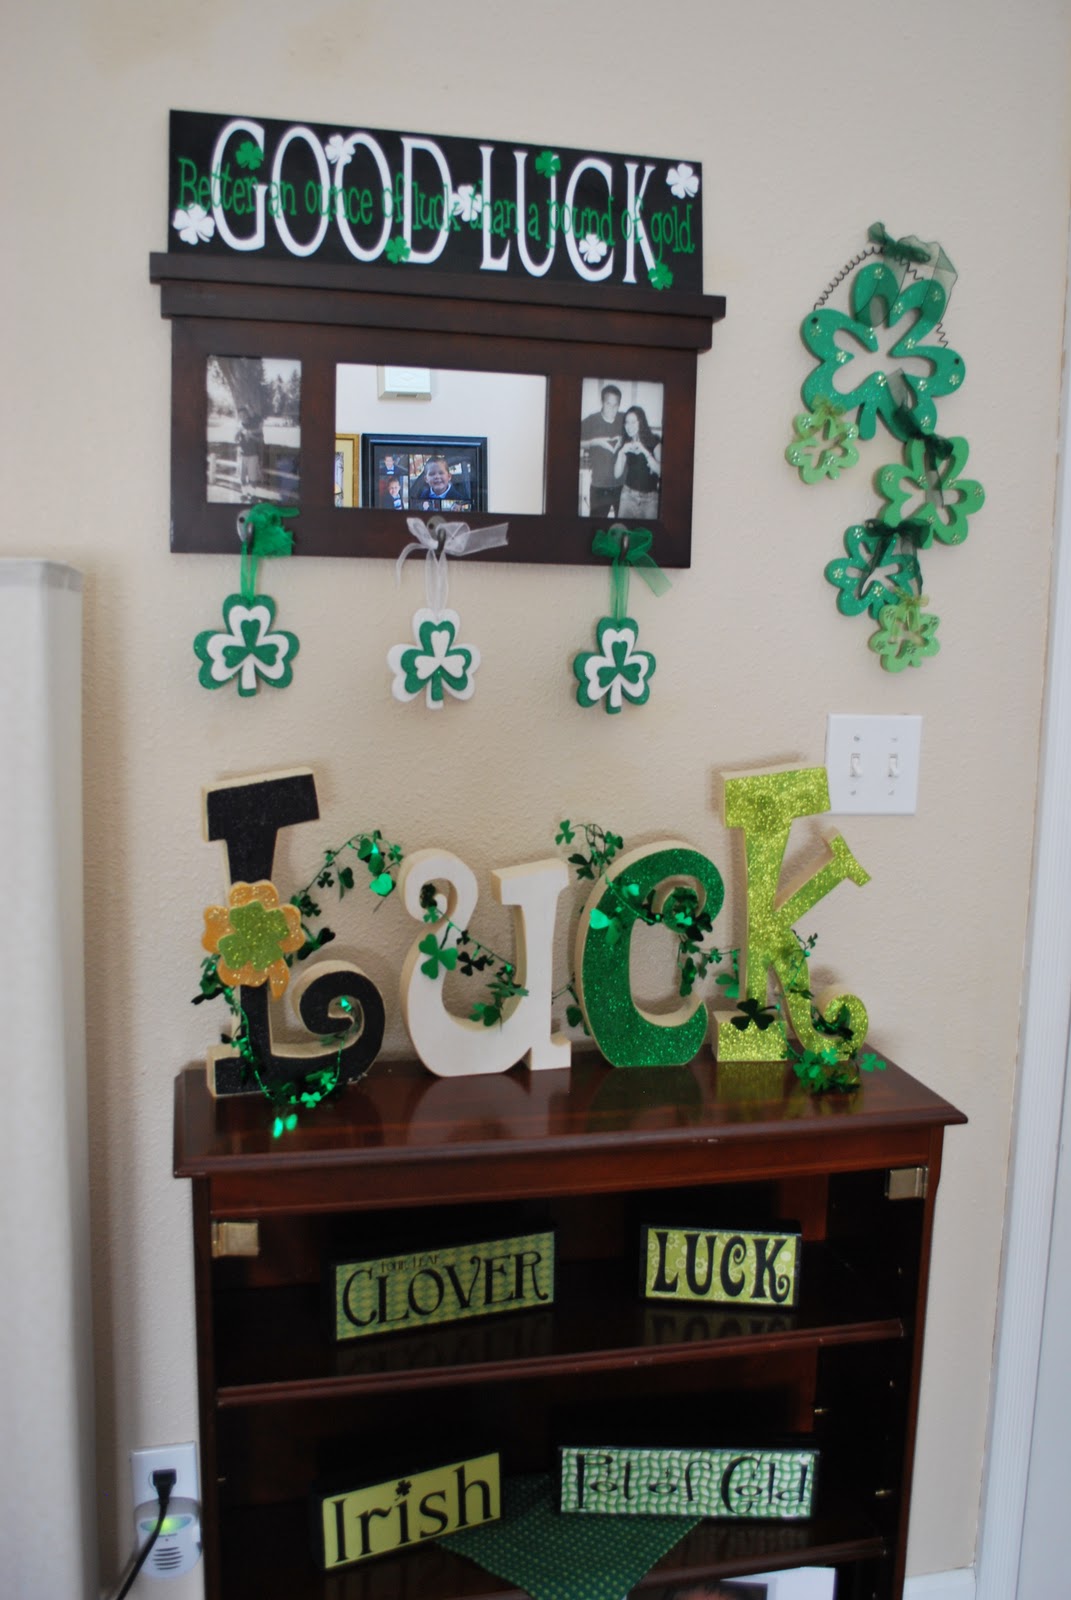
My Valentine's decorations are gone and my house is now covered in green and gold. I changed it from last year. Although I miss my gold tree, I had to fill my apothecary jars with the ornaments.
 I got these cute lanterns from Shopko...  I filled my black cauldron/pot with gold ornaments. I still have my shamrock rock art from last year.
 The back of my Valentine's board finally got a st. patricks day look.   The green quote going through the middle says "better an ounce of luck than a pound of gold.  and of course the four blocks in the cupboard have the valentines on the back.
 I made some pillowcases, got the fabric at walmart.
The back of my valentines trio blocks got finished today. I love how they turned out! A little scrapbook paper, some mod podge and some vinyl. Done.
For any of the vinyl feel free to email or comment. I would LOVE to do it for you!  I shared my decor over at and

 and Night Owl Crating!

Wednesday, February 16, 2011

Vinyl Calendar

So I've seen these quite a few places and decided to finally make one. Here is mine. I did two so I could see the next month. I recommend it.
I just used 11x14 frames from walmart. I think they were like $3.00. I took a 12x12 piece of scrapbook paper and cut it to a 11x12. With the excess 2 inches I liked it so it separated the calendar from the "notes". I have "to do, shopping, notes"
TIP: I did my vinyl backwards and stuck it to the INSIDE of the glass. that way it won't get ruined when I write and wipe things off every month.

on the second I left it plain. I usually put peoples phone numbers or address there.
If you were ambitious you could totally change out the paper to match the month. Maybe I'll do that... my cousin does and it's adorable... we'll see... ***if you use dark paper you have to use blackboard markers. they are hard to find and expensive. So that is my only problem I have with my paper selection.
I added this to Crystal's Monthly Craft Club. This month was calendars. Check it out and participate!

Monday, February 14, 2011

Love is in the Air

In honor of Valentines day I thought I'd post some of my decor.
The berry wreat is just a normal wreath that I stuck some dollar store heart picks in. The hearts on the wall i got on clearance last year at walmart. . These heart are some of my favorite things. I originally got a set from the wood connection in murray, UT, and then my friend with her mad jigsaw skills cut some more. so I was able to give a set to my sister! Paint, mod podge, scrapbook paper from the 1 spot at target and some ribbon...
The set of three hearts were purchased at wood connection as well. I did the glass block and 12x12 wood board vinyl. Email me if you want to purchase either. the Glass block is $5.00 for the white "Be Mine" and the Hot pink. the black is just a piece of cardstock. the 12x12 is $15.00 for both the white and pink layers. It could also go on a tile.

The set of three blocks are just 2x4's cut in perfect squares. so 3.5x3.5. I mod podged a lighter pink scrapbook paper on then added the vinyl. Vinyl for those would be $2.00. and of course the rocks project first seen on Tatertots and jello!

Sunday, February 13, 2011

Valentine Pillows Tutorial

Start off with three different fabrics. I got 1yd of each but didn't use all of it... I could probably make 2 or 3 more. maybe when I get some time...


1. Cut two 17x17 squares from your main fabric.
With one of the squares fold in half and cut out half a heart. (keep the cut out heart for the matching pillow)

2. open it up and determine the size of fabric you'll need to cover the heart... mine was about 10x10. Cut that out of a coordinating fabric.

3. Pin it to the back of the main fabric. (tip: you may want to pin all the way around the heart... I didn't and mine ended up a little crooked.) Then sew around the heart.

4. then you'll do a ruffle from the 3 fabric. I made my strip about 2inches.
and you'll sandwich it between the two 17x17 pieces.
5. Now you can either sew all the way around leaving a 3inch hole and stuff with poly fill, or make a pocket pillow like mine. it makes storing my pillowcases much easier and then I use the same pillow for all my different holiday pillowcases.
to make the pocket case...
6.Take the back piece of fabric and fold one end about 1 inch then fold again. Then sew to create a finished edge.
7. Then cut about a 5x17inch piece of the same fabric and make a finished edge like the step before...
8. Now when layer the front piece with the heart, then ruffle, then the two back pieces, right sides together... Overlaping the two finished edges...

Here is a close up of my edges.... hope that helps. Sew all the way around. and turn inside out and put your pillow in!
2nd Pillow
1. Cut out 17x17 pieces of fabric
2. Make a ruffle with a coordinating fabric and then using the heart cut out from pillow #1, pin the ruffle and the heart to the front of one of the 17x17 pieces.
2. Sew around the edge of the heart.
3. then Sew the front and back piece together. done.
(i did add a 2in piece of fabric folded in half between the two pillow layers for a border, but not necessary)
Good LUCK!
I entered this to Go check it out!

Friday, February 11, 2011

A block for all seasons tutorial

Growing up my mom took a tole painting class and made some blocks similiar to these, except they were all hand painted... So this is bit nostalgic for me. Here is how I made mine.

Supplies:
(4) 4x4x4 blocks... (really measures 3.5x3.5x3.5, but for some reason hardware stores call them 4x4's)...
Paint
Mod Podge
Paper cut into 3x3 squares
Vinyl

1. Paint your blocks. I was making two sets so don't be decieved by 8 blocks in the picture.

2. Mod Podge your paper to your blocks. I did all the "christmas sides" then the "home" sides. allowing it to dry in between.

3. Once all the paper has been mod podged and dried. apply the vinyl.
Here are all six sides of my blocks!
**I did revise my vinyl designs a big. The "o" in love is now a heart, the "u" in luck is now a shamrock, the "a" in fall is now a leaf, and NOEL is now snow with the "o" a snowflake... I'll update the picture soon!

I linked to
Related Posts Plugin for WordPress, Blogger...